Step 2: Design Menus & Screens
Based on your requirements, the AI proposes a menu structure and defines the purpose of each screen. You can refine the structure or let the AI take care of it entirely.
Menu Structure Overview
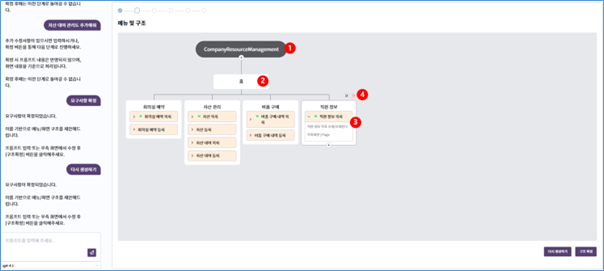
- System Name: A logical grouping generated from requirements (not part of the deployed application).
- Menu Name: You can define up to four nested menu levels. Screens are linked at the lowest level.
- Screens: Displays the screen name, description, and screen type.
- Managing Menus: Hover over a menu item to reveal these actions:
- Edit: Modify the associated screen details.
- Delete: Remove an entire menu entry.
- +: Add a new submenu under the current menu item.
Editing Screens
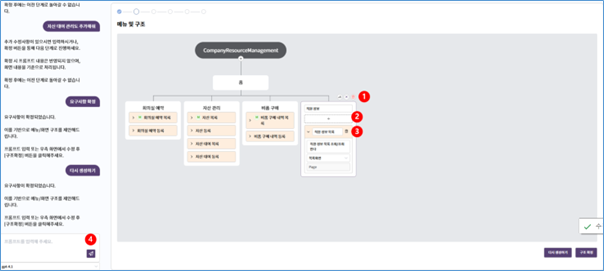
- Use toolbar icons to save changes, cancel editing, or delete a menu.
- Add a new screen directly from the interface.
- Delete an existing screen.
- Optionally, enter a prompt to restructure the menu or screen layout with AI assistance.
Confirming Structure

- Click Regenerate to rebuild the menu and screen definitions based on your confirmed requirements. All edits will be cleared.
- Click Confirm Structure to finalize the layout. Once confirmed, you cannot return to edit this stage.
Selecting a Data Source
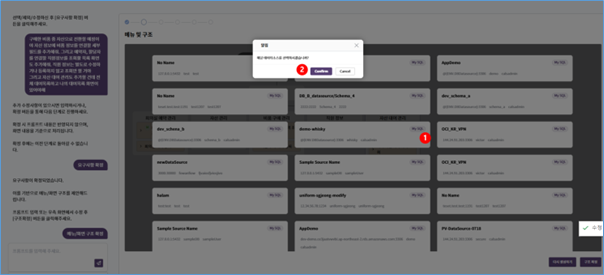
- Select a data source generating tables. The data source must already exist in CALS Studio.
- Click Confirm to continue. This action generates the table and column definitions needed for the next step.