Step 6: Arrange Components & Finalize the Application
In this final step, you’ll position components within screens based on the menu and screen definitions from Step 2 and the components generated in Step 5.
While you can freely adjust component placement, the menu and screen structure itself is already confirmed and cannot be changed.
Editing the Layout
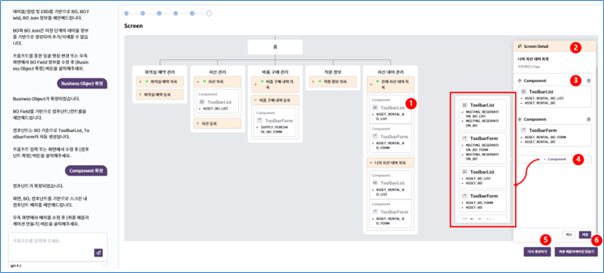
Component Assignment: Displays the list of components assigned to each screen. Drag and drop components to adjust their order.
Screen Details: Click a screen to open its detailed view.
Delete components using the delete icon.
Add components from the list generated in the previous step.
Regenerate Layout: Rebuilds the screen layout based on the current component list. Any manual layout changes will be reset.
Click Finalize Application to confirm the layout and complete the build process.
Components will be arranged within each screen based on the confirmed definitions from earlier steps.
Finalizing the Application
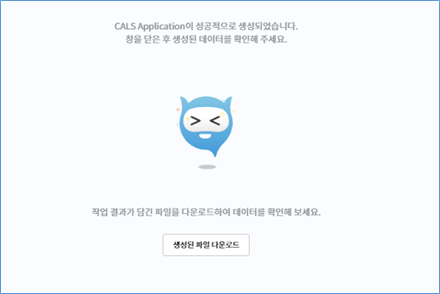
Once finalized, the system creates:
- Tables and columns
- Business Objects and fields
- Components and controls
- Screens and menus
All generated items are available in CALS Studio. The download function on this screen helps reference the created data.
After adding services and actions, and assigning permissions to the menu, screen, and component levels, use Check-in and Deploy to publish your AI-generated application.